1、图说Netty直接内存管理
2、Netty 直接内存的使用示例
            ByteBuf buf = Unpooled.directBuffer(512);
            System.out.println(buf);
            // SimpleLeakAwareByteBuf(UnpooledUnsafeDirectByteBuf(ridx: 0, widx: 0, cap: 512))
            // SimpleLeakAwareByteBuf是包装类,使用了装饰模式,内部维护一个UnpooledUnsafeDirectByteBuf,
            // 该类与UnpooledDirectByteBuf类似。首先在创建SimpleLeakAwareByteBuf的时候,会将该引用加入到内存泄漏检测
            // 的引用链中。
            try {
                //使用业务

            } finally {
                buf.release();//该方法首先调用直接内存UnpooledDirectByteBuf方法,释放所占用的堆外内存,
                              //然后调用leak.close方法,通知内存泄漏检测程序,该引用所指向的堆外内存已经释放,没有泄漏。
                              //如果 release没有调用,则当UnpooledDirectBytebuf被垃圾回收器收集号,该ByteBuf
                              //申请的堆外内存将再也不受应用程序所掌控了,会引起内存泄漏。
                /*
                 *
                 * public boolean release() {
                        boolean deallocated =  super.release();
                        if (deallocated) {
                            leak.close();
                        }
                        return deallocated;
                    }
                 */
            }
3、Netty内存检测实现原理
首先,Netty 的直接内存 ByteBuf 的数据结构:ByteBuf 对象内部维护一个 java.nio.ByteBuffer 的堆外内存。java.nio.ByteBuffer所占用的实际内存,JVM 虚拟机无法直接干预,JVM虚拟机GC只能回收 ByteBuf 对象本身,而无法回收 ByteBuf 所指向的堆外内存。
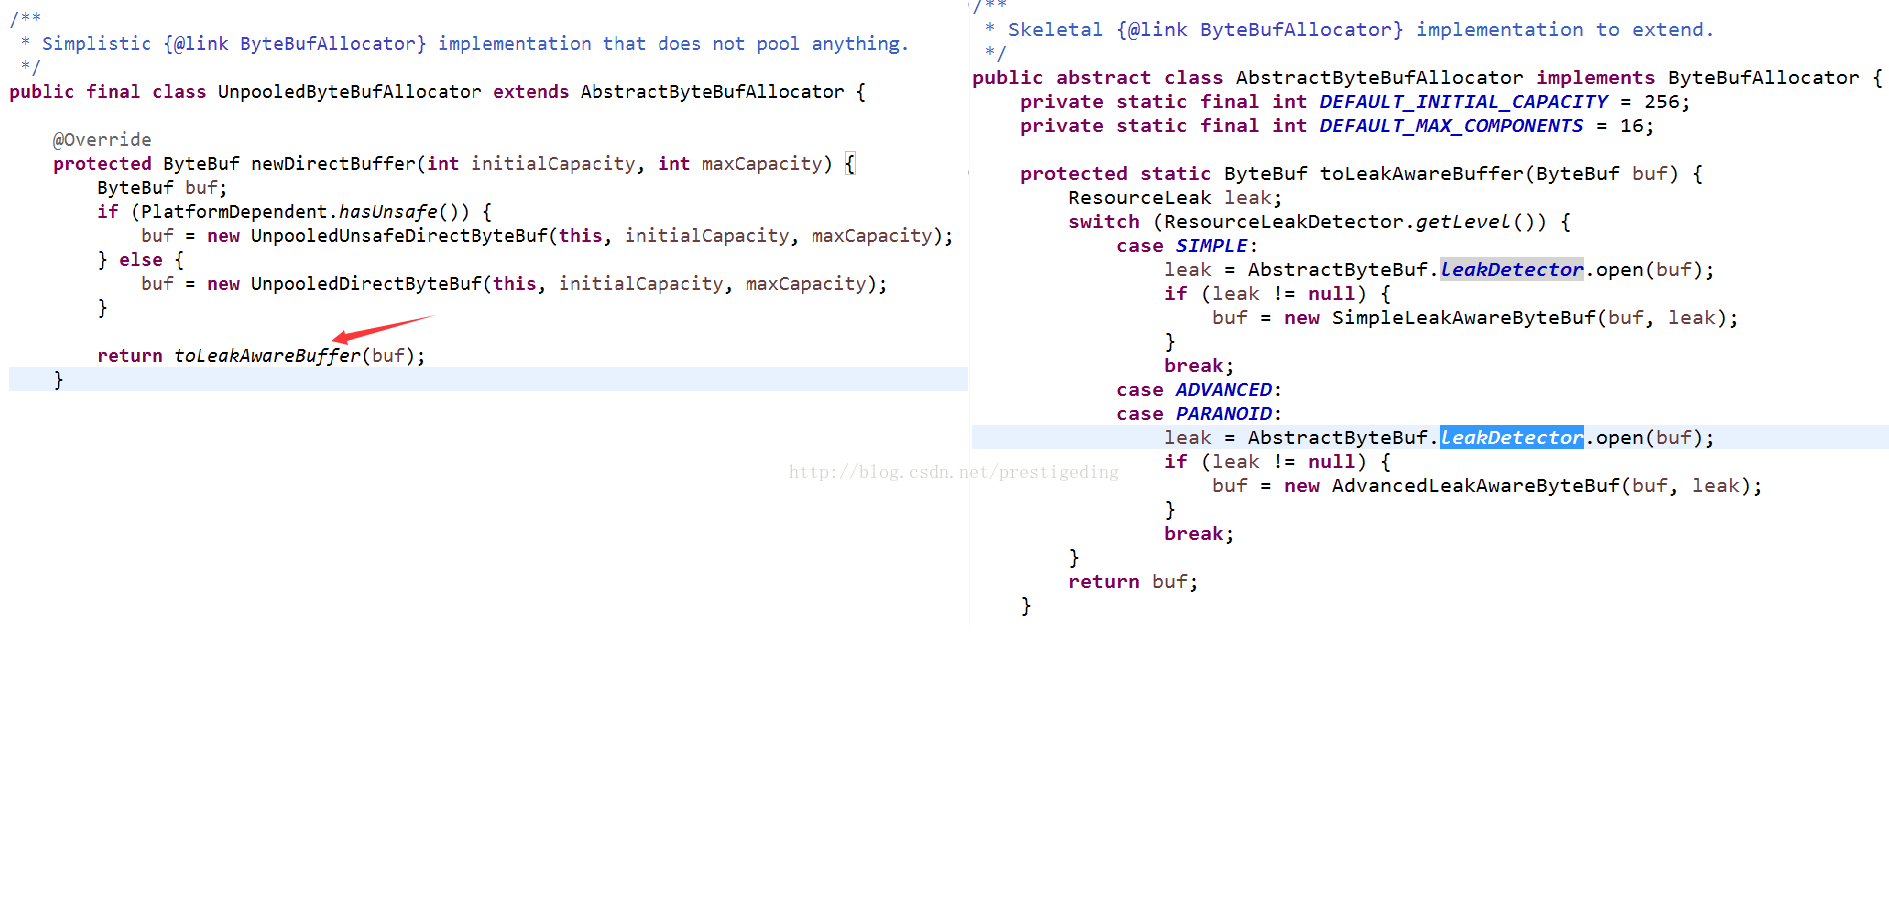
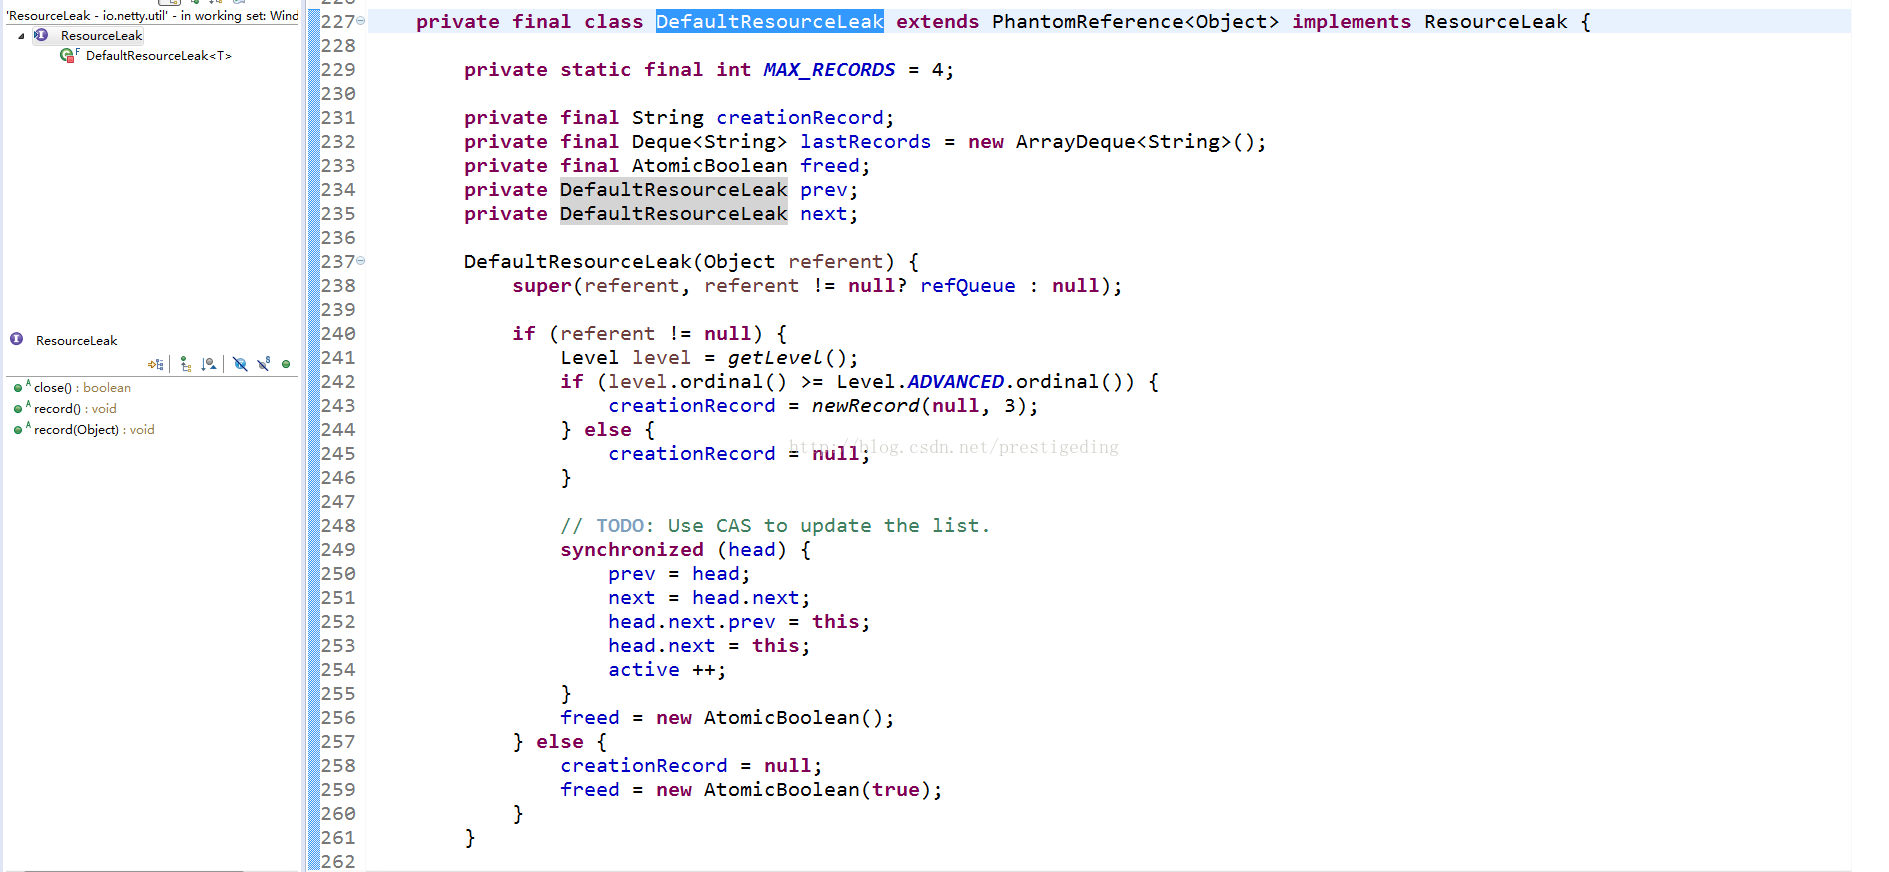
Netty封装基本的堆外内存是用 UnpooledDirectByteBuf 对象,Netty 在每次创建一个 UnpooledDirectByteBuf 时,为了能够追踪到 UnpooledDirectByteBuf 的垃圾回收,需要将该对象用一个虚拟引用指向它,将其注册到一条引用链中。然后需要将该引用对象与 ByteBuf 对象保存起来,所以 Netty 使用装饰模式,利用一个包装类 SimpleLeakAwareByteBuf 对象,将原 ByteBuf 包装一下,但对外表现的特性,就是一个ByteBuf,我们来看一下:
4、io.netty.util.ResourceLeakDetector 源码分析
4.1 内部结构详解
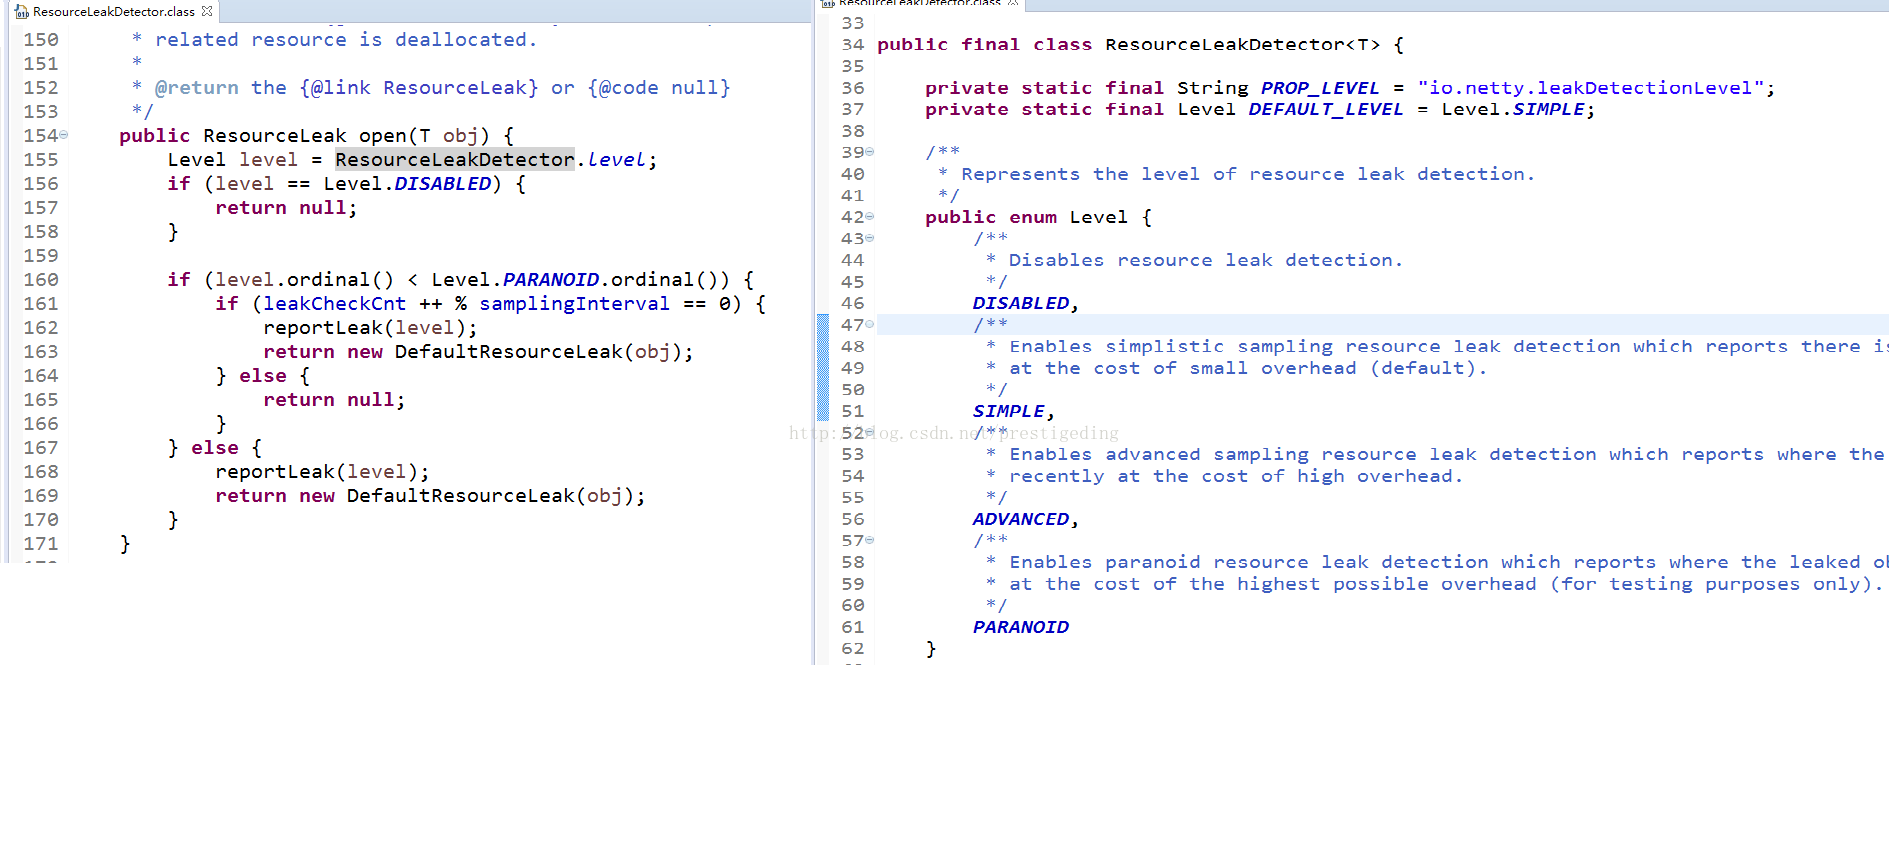
4.1.1 内存检测级别
    /**
         * Represents the level of resource leak detection.
         */
        public enum Level {
            /**
             * Disables resource leak detection.
             */
            DISABLED,
            /**
             * Enables simplistic sampling resource leak detection which reports there is a leak or not,
             * at the cost of small overhead (default).
             */
            SIMPLE,
            /**
             * Enables advanced sampling resource leak detection which reports where the leaked object was accessed
             * recently at the cost of high overhead.
             */
            ADVANCED,
            /**
             * Enables paranoid resource leak detection which reports where the leaked object was accessed recently,
             * at the cost of the highest possible overhead (for testing purposes only).
             */
            PARANOID
}- DISABLED : 禁用内存泄露检测
- SIMPLE:默认的内存检测级别,以一个时间间隔,默认是每创建113个直接内存(堆外内存)时检测一次。
- ADVANCED与PARANOID 每次产生一个堆外内存,目前这两个在Netty的实现中等价,统一用ADVANCED来实现。
4.1.2 内部属性
    /** the linked list of active resources */
        private final DefaultResourceLeak head = new DefaultResourceLeak(null);
        private final DefaultResourceLeak tail = new DefaultResourceLeak(null);

        private final ReferenceQueue<Object> refQueue = new ReferenceQueue<Object>();
        private final ConcurrentMap<String, Boolean> reportedLeaks = PlatformDependent.newConcurrentHashMap();

        private final String resourceType;
        private final int samplingInterval;
        private final long maxActive;
        private long active;
        private final AtomicBoolean loggedTooManyActive = new AtomicBoolean();

private long leakCheckCnt;- ResourceLeakDetector
内部维护一个双端链表,维护所有指向堆外内存的引用对象链(ResourceLeak对象链,ResourceLeak的实现类,继承虚拟引用PhantomReference),head 与 tail 是虚拟节点。 - refQueue
引用队列,该引用队列正存放的是 ResoureLeak 对象链,代表着这里面的引用对象所指向的对象已被垃圾回收。按照常理,如果该 ResourceLeak 对象,也同时存在于上面的双端链表中,说明发生了内存泄漏。 - resourceType
检测对象的完全限定名称,主要用途用于报告内存泄漏时,相关的详细信息。 - samplingInterval
内存泄漏检测级别是SIMPLE时,的检测频率,默认113,单位为个,而不是时间。 - maxActive
该类对象的最大激活数量。 - active
当前激活的数量。 - loggedTooManyActive
active * samplingInterval > maxActive 条件满足时,是否打印日志。
4.2.1 ResourceLeakDetector open 方法详解
AbstractByteBufAllocator 的 toLeakAwareBuffer 入口,然后进入到 ResourceLeakDetector open方法。
    protected static ByteBuf toLeakAwareBuffer(ByteBuf buf) {
            ResourceLeak leak;
            switch (ResourceLeakDetector.getLevel()) {
                case SIMPLE:
                    leak = AbstractByteBuf.leakDetector.open(buf);
                    if (leak != null) {
                        buf = new SimpleLeakAwareByteBuf(buf, leak);
                    }
                    break;
                case ADVANCED:
                case PARANOID:
                    leak = AbstractByteBuf.leakDetector.open(buf);
                    if (leak != null) {
                        buf = new AdvancedLeakAwareByteBuf(buf, leak);
                    }
                    break;
            }
            return buf;
        }
该方法的意思是如果返回一个 ResoureLeak,则用 ResourceLeak 与当前的 ByteBuf 放入一个包装类,跟踪该直接内存的回收情况,检测内存泄露。如果没有产生一个 ResourceLeak,则不会跟踪直接内存的泄露检测。
    /**
         * Creates a new {@link ResourceLeak} which is expected to be closed via {@link ResourceLeak#close()} when the
         * related resource is deallocated.
         *
         * @return the {@link ResourceLeak} or {@code null}
         */
        public ResourceLeak open(T obj) {
            Level level = ResourceLeakDetector.level;
            if (level == Level.DISABLED) {
                return null;
            }

            if (level.ordinal() < Level.PARANOID.ordinal()) {
                if (leakCheckCnt ++ % samplingInterval == 0) {
                    reportLeak(level);
                    return new DefaultResourceLeak(obj);
                } else {
                    return null;
                }
            } else {
                reportLeak(level);
                return new DefaultResourceLeak(obj);
            }
        }
如果使用检测级别是 SIMPLE 时,每产生 113 个直接内存对象时,才会跟踪一个。我个人觉得有问题,为什么不每次产生一个,都跟踪,但只每产生113个时,调用一次 reportLeak 方法检测内存泄露。
接下来,主要以reportLeak方法,检测内存泄露方法来说明整个实现机制。
    private void reportLeak(Level level) {
            if (!logger.isErrorEnabled()) {
                for (;;) {
                    @SuppressWarnings("unchecked")
                    DefaultResourceLeak ref = (DefaultResourceLeak) refQueue.poll();
                    if (ref == null) {
                        break;
                    }
                    ref.close();
                }
                return;
            }

            // Report too many instances.
            int samplingInterval = level == Level.PARANOID? 1 : this.samplingInterval;
            if (active * samplingInterval > maxActive && loggedTooManyActive.compareAndSet(false, true)) {
                logger.error("LEAK: You are creating too many " + resourceType + " instances.  " +
                        resourceType + " is a shared resource that must be reused across the JVM," +
                        "so that only a few instances are created.");
            }

            // Detect and report previous leaks.
            for (;;) {     //  @1
                @SuppressWarnings("unchecked")
                DefaultResourceLeak ref = (DefaultResourceLeak) refQueue.poll();    //@2
                if (ref == null) {
                    break;
                }

                ref.clear();

                if (!ref.close()) {   // @3
                    continue;
                }

                String records = ref.toString();
                if (reportedLeaks.putIfAbsent(records, Boolean.TRUE) == null) {   //@3
                    if (records.isEmpty()) {
                        logger.error("LEAK: {}.release() was not called before it's garbage-collected. " +
                                "Enable advanced leak reporting to find out where the leak occurred. " +
                                "To enable advanced leak reporting, " +
                                "specify the JVM option '-D{}={}' or call {}.setLevel()",
                                resourceType, PROP_LEVEL, Level.ADVANCED.name().toLowerCase(), simpleClassName(this));
                    } else {
                        logger.error(
                                "LEAK: {}.release() was not called before it's garbage-collected.{}",
                                resourceType, records);
                    }
                }
            }
        }
代码@1:开始内存泄露检测。
代码@2:从垃圾回收器通知的引用队列中找(位于该队列中的引用代表该引用执向的对象已经被垃圾回收器回收了),如果调用close 方法,返回f alse, 说明没有泄露,close 方法第一次调用时,会返回 true,将 DefaultResourceLeak 的 free设置为true,表示已经释放,所以在检测是否泄露的时候,只要内存泄露程序调用 close 不是第一次调用,就可以说明内存未泄露。
代码@3:reportedLeaks 存放的是发生内存泄露的信息。
5、总结
Netty 内存检测原理:利用虚引用跟踪 ByteBuf 的对象的回收,并在垃圾回收后检测 ByteBuf 的 release方法是否有执行过,其实就是 DefaultResoureLeak 的 close 方法是否执行过判断是否发生了内存泄漏。同时利用装饰模式,将用于跟踪垃圾回收的虚引用 DefaultRersourceLeak 与具体的 BtyeBuf 包装起来,装饰类:WrappedByteBuf进行包装。
关于Netty的分析就到处为止,下一篇将学习Netty PooledByteBuf 的实现原理,敬请期待。
来源:https://blog.csdn.net/prestigeding/article/details/53977445


[…] 源码分析Netty内存泄漏检测 […]